Scraping Amazon: A Step-by-Step Guide toCreating Your Own Scraper
DataProt is supported by its audience. When you buy through links on our site, we may earn a commission. This, however, does not influence the evaluations in our reviews. Learn More.
Being one of the largest online retailers, it’s no surprise that Amazon is packed with a wealth of product data – from product information to reviews. As such, gaining a deep understanding of product trends is paramount for those looking to succeed in e-commerce. Fortunately, web scraping offers a powerful way to gather massive amounts of data, making it an invaluable tool for e-commerce success.
In this tutorial, you’ll learn how to create a web scraper from scratch using Python. You’ll also learn the caveats and challenges of scraping Amazon and how to bypass those challenges.
Let’s get started!
Set up
First, you’ll need to install Python to follow this tutorial. Once you’ve done that, you can run the command below in your terminal. With this command, we’re installing the necessary dependencies, such as requests, pandas, and Beautiful Soup 4:
Unset
pip install requests pandas bs4
How to Fetch Amazon Product Pages
Now, let’s begin writing the scraper. First, you’ll need to import all three libraries that you’ve just installed. Then you’ll use them to send a GET request to fetch the Amazon product page.
Import libraries
The below code will import the necessary libraries:
Python
import requests
from bs4 import BeautifulSoup
import pandas as pd
Making HTTP requests
Next, you’ll use the requests module to make an HTTP GET request to Amazon’s web server:
Python
page = 'https://www.amazon.com/iPhone-Pro-Max-128GB-Gold/dp/B0BGYDDWDF/'
response = requests.get(page)
print(response.status_code)
At this point, if you executed the code successfully, you would expect to see the output 200. However, if it prints 503, which means something went wrong.
Amazon’s anti-bot challenge
In this case, Amazon’s anti-bot protection blocked your request. Many websites have security measures in place to protect themselves against malicious bots. While our scraper is not malicious, Amazon’s protection systems can confuse it for one. Let’s see how to deal with this.
You can validate it by checking the source of the response:
Python
print(response.text)
This will show the HTML source of the response in the text format. However, if you want to see how it looks on a browser, just save the HTML document locally and open it in a browse. It will look similar to the one below:
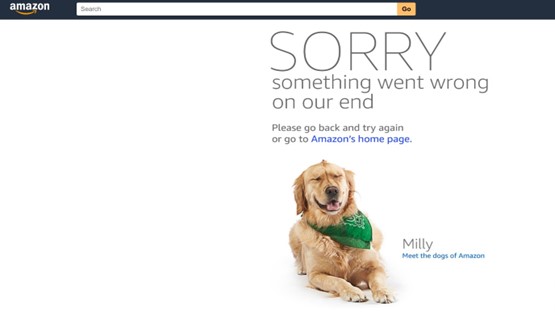
As mentioned above, we got a 503 error. Not to worry, this is a simple bot protection challenge that you can bypass by using a User-Agent header.
Adding User-Agent
So, let’s add a custom header. You’ll have to create a headers dict with the
User-Agent string and pass it to the GET method:
Python
headers = {
'User-Agent': 'Mozilla/5.0 (Windows NT 10.0; Win64; x64) AppleWebKit/537.36
(KHTML, like Gecko) Chrome/114.0.0.0 Safari/537.36'
}

response = requests.get(page, headers=headers)
print(response.status_code)
print(response.text)
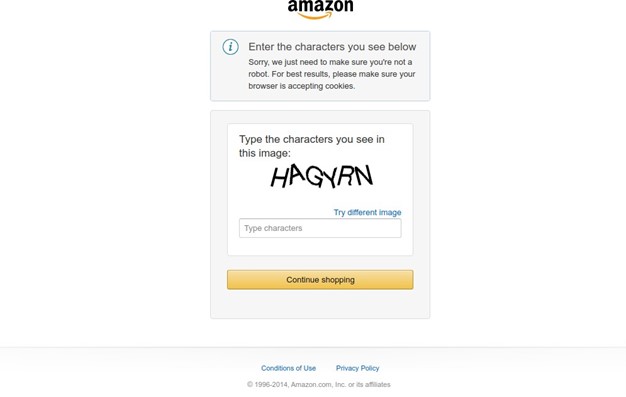
This time you get a status code of 200 as output. This status code indicates everything worked well. However, once you check the HTML source code, you’ll notice a CAPTCHA test, which Amazon employs as a sophisticated anti-bot system.
Bypassing this CAPTCHA challenge is a lot more difficult. You’ll have to use a
good-quality proxy pool and rotate them from time to time. Additionally, you should consider adding more headers to simulate a real web browser.
Adding a Proxy
Manually handling multiple proxies, rotating them, and maintaining your code can become quite tedious, especially if you start scaling your scraper. Thankfully, there are many solutions out there that take away the hassle of doing all that.
For example, Oxylabs Web Unblocker proxy solution is among the best-performing ones. It will automatically manage the proxy pool, headers, cookies, and other browser parameters for you, so you don’t have to worry about getting blocked. You can also sign up and try it out for free before committing.
To integrate it, you need to configure the code as exemplified below. Note that you will need Web Unblocker credentials that you get upon registering.
Python
proxy = 'http://{}:{}@unblock.oxylabs.io:60000'.format('USERNAME', 'PASSWORD')
proxies = {
'http': proxy, 'https': proxy
}
response = requests.get(page, proxies=proxies, verify=False)
You’ll have to replace USERNAME and PASSWORD with your sub-user credentials. Also, when creating a network request, you’ll have to pass an additional parameter verify=False as shown above.
Extracting Product Information
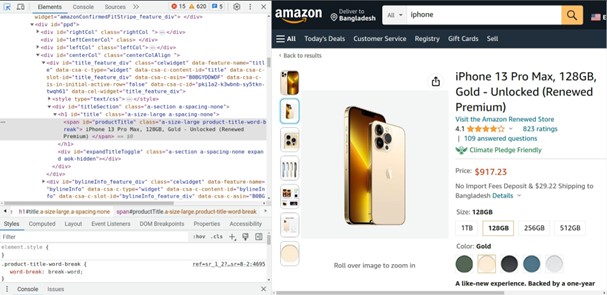
If you run the code, the response object will now have the HTML source code of the Amazon product page. Before you begin parsing the product information, you’ll have to inspect the target elements using a web browser. To do that:
- Open the product link in a web browser.
- Right-click on the screen.
- Select Inspect.
That’s the view you should get:
Now, let’s use Beautiful Soup to parse this HTML content and extract the elements:
Python
data = []
soup = BeautifulSoup(response.content, 'html.parser')
Product Title
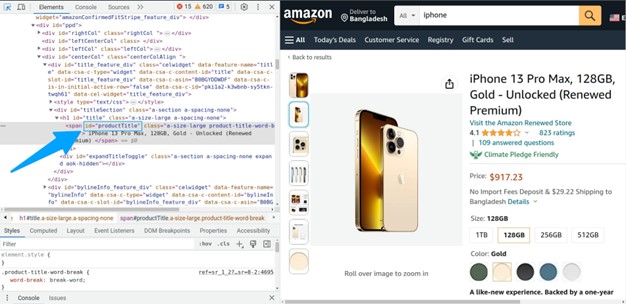
Beautiful Soup will parse the HTML and create a soup object. Using this object, you can extract the product title. Carefully inspect the product page again:
Notice that the title has a property id=”productTitle”. Using this property we can select it as below:
Python
title = soup.find('span', {'id': 'productTitle'}).text
Product Price
Next, let’s grab the product price. Inspect the price element using the browser:
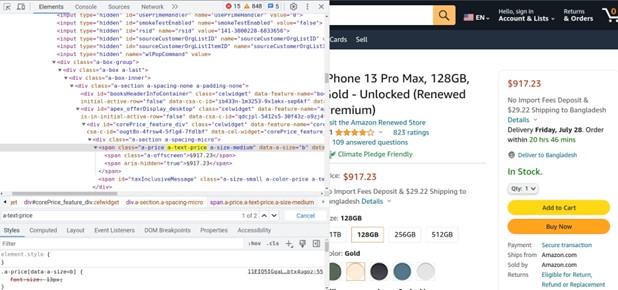
As you can see, the price is in the span element, wrapped in another span element with a class a-text-price:
Python
price = soup.find('span', {'class': 'a-text-price'}).find('span').text
Product Rating
Similarly, you can also extract the total amount of product ratings:
Python
total_ratings = soup.find('span', {'id': 'acrCustomerReviewText'}).text
Then, you can use the following code line to extract the product rating score:
Python
rating = soup.find('a', {'class': 'a-popover-trigger
a-declarative'}).find('span', {'class': 'a-size-base a-color-base'}).text
Storing Data Into CSV
Once you’re done selecting the elements you want to extract, let’s get all this information in a usable format.
Using panda’s data frame object, let’s export the data in a CSV file with the following line of code. Since you don’t need an index, set the index to False.
Python
data.append({
'title': title, 'price': price,
'total ratings': total_ratings, 'rating': rating
})
df = pd.DataFrame(data) df.to_csv('amazon_product_data', index=False)
Full Source Code
You can also modify the code to extract multiple products by using a list of product URLs and a simple for loop. Note that Web Unblocker uses headers automatically, so you don’t need to pass additional HTTP headers. The full source code is given below:
Python
import requests
from bs4 import BeautifulSoup import pandas as pd
proxy = 'http://{}:{}@unblock.oxylabs.io:60000'.format('USERNAME', 'PASSWORD')

proxies = {
'http': proxy, 'https': proxy
}
pages = [
'https://www.amazon.com/iPhone-Pro-Max-128GB-Gold/dp/B0BGYDDWDF/'
data = []
for page in pages:
response = requests.get(page, proxies=proxies, verify=False) soup = BeautifulSoup(response.content, 'html.parser')
title = soup.find('span', {'id': 'productTitle'}).text
price = soup.find('span', {'class': 'a-text-price'}).find('span').text total_ratings = soup.find('span', {'id': 'acrCustomerReviewText'}).text rating = soup.find('a', {'class': 'a-popover-trigger
a-declarative'}).find('span', {'class': 'a-size-base a-color-base'}).text data.append({
'title': title, 'price': price,
'total ratings': total_ratings, 'rating': rating
})
df = pd.DataFrame(data) df.to_csv('amazon_product_data', index=False)
Conclusion
Hopefully, this step-by-step guide has equipped you with the necessary skills to navigate the Amazon website, extract product data, and overcome anti-bot challenges. Having the ability to gather data from Amazon opens up a world of possibilities for market research, competitor analysis, pricing optimization, and much more!